Last year I got into Gunpla, a hobby where you build little plastic model anime robots. What I like most about the hobby is that the models are “press-fit”, meaning you can build the entire model by pressing the parts together with your fingers. No gluing, no painting, just fingers. You can follow the directions and have a little plastic robot model in one sitting. That low-barrier of entry is a key part of what makes Gunpla fun.
Although tools are not required, a handful of tools improve the experience and output. As I’ve been progressing at Gunpla, my modest toolset has evolved. This post is a half “how it started / how it’s going” post about my Gunpla tools and half a reflection about tools in general. What are tools for? Why do we choose them? Are the more expensive tools worth it? Let’s dig in.
Entry toolset: $9

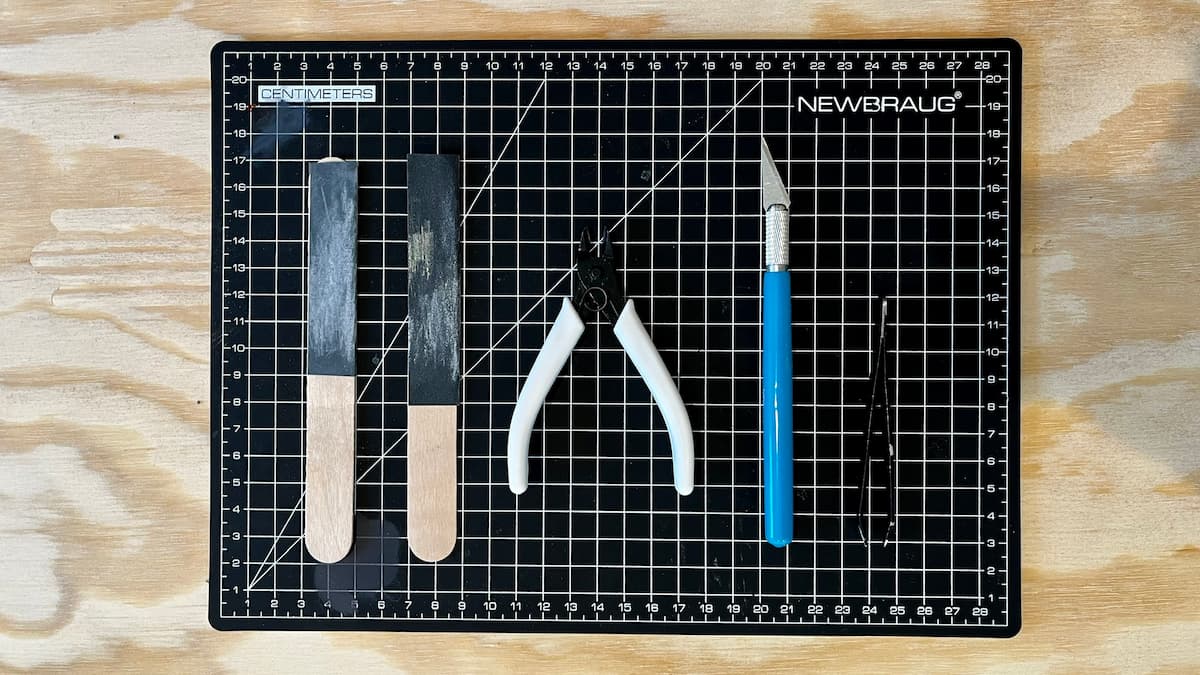
The one tool you’ll want for most kits is a cutter to remove the plastic parts from their sheet of parts, called a “runner”. I used an X-Acto knife on my first Entry Grade model which wasn’t ergonomic (nor safe) for me, so my first specialized tool was a pair of Entry Nippers ($9). “Nippers” are small plier-like cutters that are effective at removing parts from their runners and trimming the left over “gates” which connect the part to the runner.
My next set of tools were handmade and repurposed. I glue-sticked small strips of sandpaper to popsicle sticks. A 600 grit for removing any plastic nubs the nippers didn’t get and an 800 grit to give a decently smooth finish. I also repurposed some bathroom tweezers ($FREE) for applying stickers that come included in the sets. I was proud of myself for being low-budget and clever with my handmade tools, but they have some weaknesses…
The popsicle sticks weren’t… ahem… exact, so I’d end up over-sanding pieces (or my thumbs) often. The nippers also were not exact and flush-cutting, leaving some excess from the gate which required more sanding which led to more mistakes. And the slant-tip ends of the tweezers obscured by my fat fingers made applying stickers more difficult.
I could see places in my earlier models where the fit and finish needed improvement. Curious if better tools would improve the process or my enjoyment, I watched a lot of videos and invested in some fancier tools.
Current toolset: $110

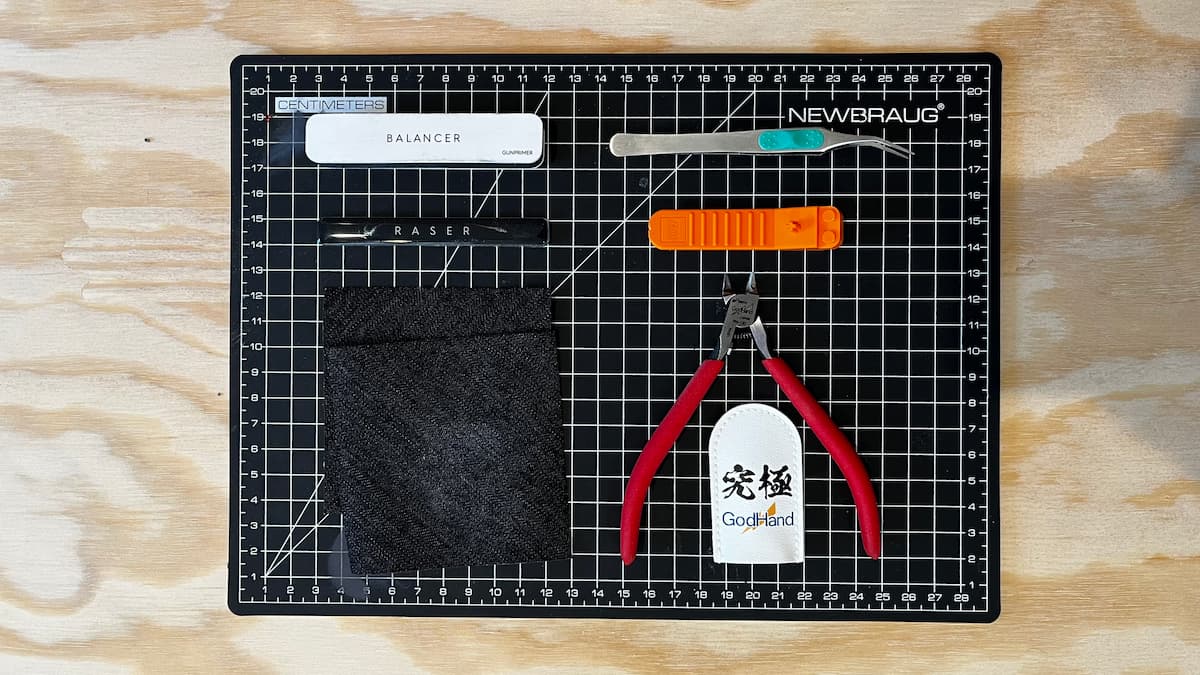
First, the GodHand Blade One Nippers for $43. It’s hard to describe these. My old nippers weren’t bad, but these are great. They cut through the plastic like hot butter and give me precise cuts that require minimal sanding and polishing. A good investment for lowering the effort and amount of potentially destructive work I need to do later.
The next is the Gunprimer Gate Removal Set ($45). The “Raser” is a thin glass file that shaves off excess gates without over-filing and damaging the rest of the plastic. Then the “Balancer”, a buffing sponge with two slightly different grits, can give you a matte or polished finish. While nail filing technology isn’t revolutionary, when applied to Gunpla, it’s luxurious. Compared to my sanding sticks, these increase the quality of the models a lot. Sanding every piece after every cut is not only easier, it’s a joy.
The last bits are the Mr. Hobby Mr. Angled Tweezers ($12) which give me pinpoint sticker application precision. I wouldn’t have thought having the right tweezers made a difference, but having distance between my fingers and the pinchers makes sticker application less clumsy, except for my shaking.

The next frontier of tools for me is getting into painting and panel lining. These steps are not required, but panel lining adds the tiniest bit of depth, giving more shadows and drama to the model. I’m sure I will ruin a dozen models learning how to make them more realistic, but that’s half the fun.
A reflection on tools in general
I’ve spent the last year improving my hobby tools so I can build better models. I’ve also spent the last year building a tool called Luro to help teams build better products. Tools have been at the forefront of my mind while I whittle away at my plastic crafts.
Here’s three lessons I’ve learned about tools:
- Better tools doesn’t always equal speed. It’s easy to trick yourself in the evaluation stage by saying “This tool is going to make the job so fast!” It rarely turns out to be true. In fact, I’ve experienced the opposite but in a good way. Situations exist where I am faster, but having better tools gives me the (emotional?) bandwidth to spend more deliberate time on a given task. I’m not sanding because I made a bad cut, I’m sanding because I want it to look good. There’s a difference. Time and quality will always be in an eternal struggle, but it’s important that I don’t waste time and spoons doing processes the hard way. That’s because…
- Better tools make tedious work easier and more enjoyable. Better tools reduce the burden and friction of a task, drawing me into making improvements rather than calling it “good enough” and skipping to the next job. Whether it’s sticker application, sanding, or precise cutting; it’s easier to do —and repeat those processes— when you have the right tools in place.
- Better tools help produce better, more consistent outcomes. This is probably the most important lesson I learned. Ideally your tools are helping push the needle towards consistently good outcomes. Consistently bad is worse than consistently good, and inconsistent is possibly the enemy of both. If your tools aren’t pushing you towards higher quality and making work more enjoyable, it’s worth re-evaluating them.
All this thinking about tools, I’m reminded of one of my favorite Kevin Kelly (creator of Wired, editor of Whole Earth Review) quotes:
A tool is an opportunity with a handle
— Kevin Kelly
You don’t have to buy into and use every tool, but some tools bring opportunity. For me, specialized tools that solve the nichest of problems are the most compelling. Start with the tools you have, please, but if you come across a tool special built to solve your specific flavor of tedium, grab on to it. Even if for only a while.